.net 开发 MCP 服务器
微软手册 :快速入门 - 创建最小 MCP 服务器并发布到 NuGet - .NET | Microsoft Learn
官方库:https://github.com/modelcontextprotocol/csharp-sdk
我目前使用微软的库实现,官方库以后再研究
安装
安装服务模板 dotnet new install Microsoft.Extensions.AI.Templates
创建应用 dotnet new mcpserver -n IoxMcpServer
修改项目配置文件中的 <PackageId/> 值,让他在 nuget 中为唯一值,比如 iox.SampleMcpServer
根据需要修改项目配置文件中的其它值,注意 <PackageTags /> 中的分隔符不要弄错,不然生成 nuget 包类型时 packageType 可能不会包括 McpServer
        <!-- Set up the NuGet package to be an MCP server -->
        <PackAsTool>true</PackAsTool>
        <PackageType>McpServer</PackageType>

        <!-- Set recommended package metadata -->
        <PackageReadmeFile>README.md</PackageReadmeFile>
        <PackageId>iox.SampleMcpServer</PackageId>
        <PackageVersion>0.2.3-beta</PackageVersion>
        <PackageTags>AI; MCP; server; stdio; wheather</PackageTags>
        <Description>心知天气 MCP Server。 使用心知天气免费接口查询天气</Description>
开发项目
Program 中修改加入工具类
Encoding.RegisterProvider(CodePagesEncodingProvider.Instance); // gb2312 支持

builder.Services.AddMcpServer().WithStdioServerTransport()
    .WithTools<CityWeatherTools>(); // 加入这一行
    // WithToolsFromAssembly 或是扫描程序集,自动添加工具类
开发代码
- 一个
MCP Host对应一个项目进程实例,每次调用时创建一次工具类并调用 - 工具类支持注入
- 工具类中使用
Environment.GetEnvironmentVariable("SENIVERSE_KEY")读取付入的变量 - 使用
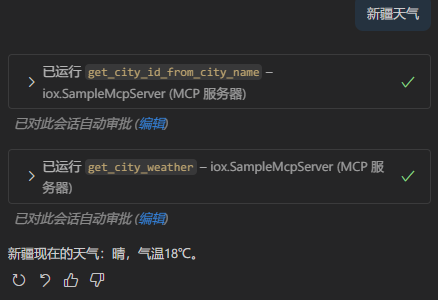
ILogger或是Console写日志 - 下面为了测试将调用分为两步,查询天气时先根据城市名返回城市编号,然后使用城市编号查询天气,当调用
Agent查询城市天气时,它知道先调用GetCityIdFromCityNameAsync,再根据返回的参数调用GetCityWeatherAsync
internal class CityWeatherTools(IHttpClientFactory httpClientFactory, CityCodeReader cityCodeReader, ILogger<CityWeatherTools> logger)
{
    [McpServerTool]
    [Description("根据城市名称返回指定城市 CityId")]
    public async Task<string> GetCityIdFromCityNameAsync([Description("待查询城市的名称")] string cityName)
    {
       throw new NotImplementedException();
    }

    [McpServerTool]
    [Description("返回指定城市的天气")]
    public async Task<string> GetCityWeatherAsync(
        [Description("待查询天气的城市的 CityId")] string cityId)
    {
        throw new NotImplementedException();
    }

    private void LogInformation(string message)
    {
        logger.LogInformation($"{this.GetType().Namespace} {message}");
    }
}
调试
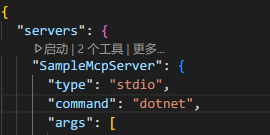
新建 vscode 项目文件夹,创建 .vscode\mcp.json 文件, 填写以下内容
{
  "servers": {
    "SampleMcpServer": {
      "type": "stdio",
      "command": "dotnet",
      "args": [
        "run",
        "--project",
        "<项目所在目录>"
      ],
      "env": {
        "SENIVERSE_KEY": "<调用时传入变量>"
      }
    }
  }
}
项目中会出现启用等快捷菜单, 点击更多可以查看日志选项, 打开聊天,选择 Agent

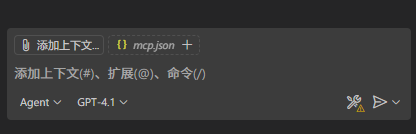
提问,得到回复
发布
完善项目中的 .mcp/server.json。执行时使用 dnx packages.name@packages.version 所以这两个值要输入正确
{
  "$schema": "https://modelcontextprotocol.io/schemas/draft/2025-07-09/server.json",
  "description": "心知天气 MCP Server。 使用心知天气免费接口查询天气",
  "name": "io.github.ioxinfty/IoxMcpServer",
  "packages": [
    {
      "registry_name": "nuget",
      "name": "iox.SampleMcpServer", // 要与 csproj 中的 PackageId 一致
      "version": "0.2.3-beta",
      "package_arguments": [],
      "environment_variables": [
        {
          "name": "SENIVERSE_KEY",
          "value": "{seniverse_key}",
          "variables": {
            "seniverse_key": {
              "description": "设置心知天气的调用 KEY.",
              "is_required": true,
              "is_secret": true
            }
          }
        }
      ]
    }
  ],
  "repository": {
    "url": "https://github.com/ioxinfty/IoxMcpServer",
    "source": "github"
  },
  "version_detail": {
    "version": "0.2.2-beta"
  }
}
根据需要修改 readme.md
打包 dotnet pack -c Release, 发布包默认在 ./bin/Release/xxx.nupkg
发布到 nuget dotnet nuget push bin/Release/*.nupkg --api-key key --source https://apiint.nugettest.org/v3/index.json
发布到 nuget 测试平台 dotnet nuget push bin/Release/*.nupkg --api-key key --source https://apiint.nugettest.org/v3/index.json
创建 APIKEY 时, 根据需要设置,简单的话,直接设置为
*
查看发布的 nuget 包,上传后在 Unlisted Packages 中, 无法搜索, 一般 几分钟后会到 Published Packages 列表中,如果正常的话,详细信息中会有 MCP Server 标签页
如果没有 MCP Server 标签页,使用 nuget 工具查看是否有 <packageType name="McpServer" /> 标签,一般是项目信息没有填写正确
使用
复制 nuget 中的 MCP Server 中的内容到 vscode 项目目录中的.vscode\mcp.json 文件内容
也可直接执行 dnx iox.SampleMcpServer@0.1.0-beta --yes 如果是测试环境中的项目,加上 --add-source https://apiint.nugettest.org/v3/index.json
dnx 需要安装 .net 10 sdk, 以后可能会移到 runtime 中。
执行的时候,dnx 自动从 nuget 下载程序
{
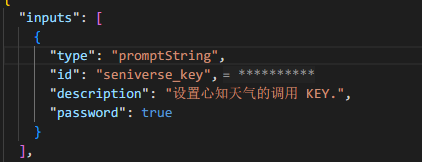
"inputs": [
{
"type": "promptString",
"id": "seniverse_key",
"description": "设置心知天气的调用 KEY.",
"password": true
}
],
"servers": {
"iox.SampleMcpServer": {
"type": "stdio",
"command": "dnx",
"args": ["iox.SampleMcpServer@", "--yes"], // 如果是测试环境中的项目加上 `--add-source https://apiint.nugettest.org/v3/index.json`
"env": {
"SENIVERSE_KEY": "${input:seniverse_key}"
}
}
}
}第一次运行的时候,程序会自动提示要求输入 seniverse_key